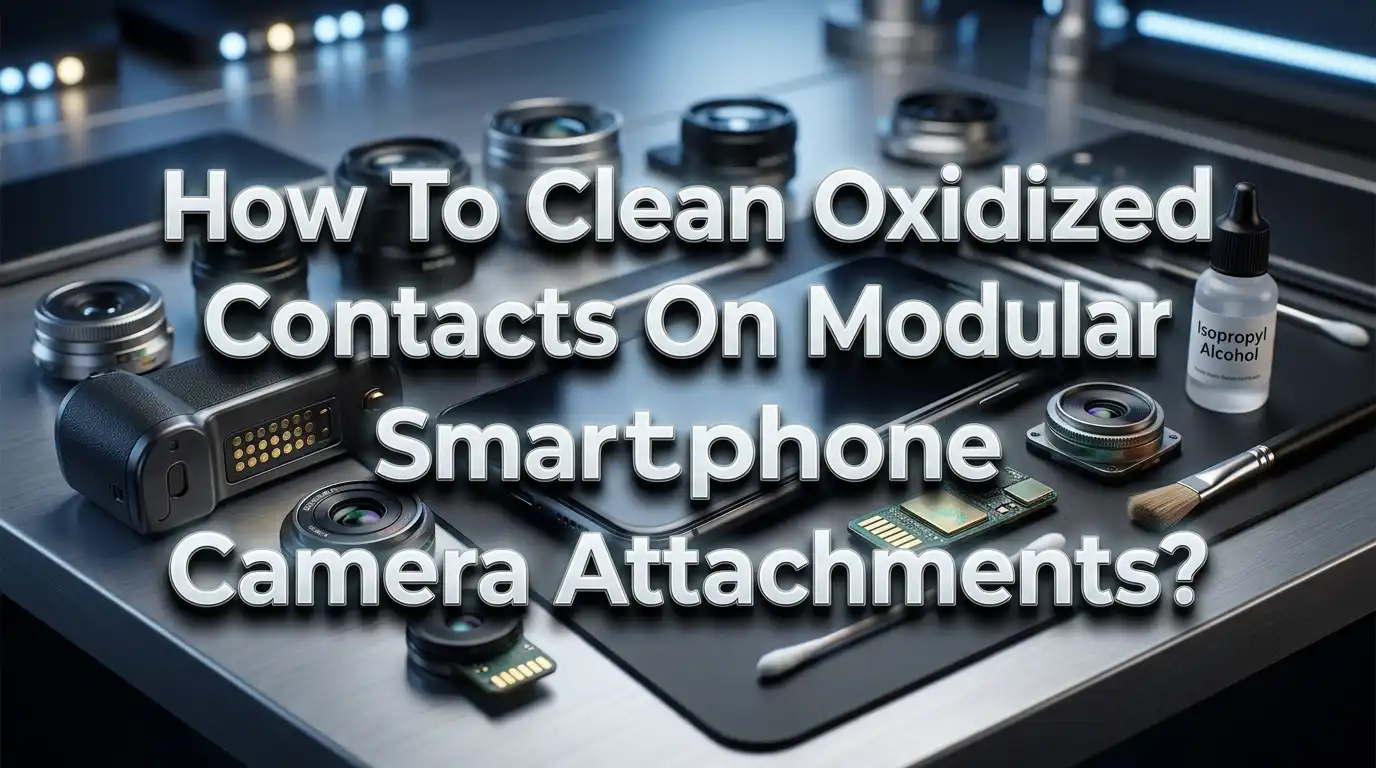
How To Clean Oxidized Contacts On Modular Smartphone Camera Attachments?
Your modular smartphone camera attachment suddenly stops working. The image quality drops. The phone fails to recognize the lens module. You twist it off and notice something alarming: a thin, discolored film on the metal contact points. That film is oxidation, and it is the silent enemy of every modular camera accessory.
Oxidized contacts block the flow of electrical signals between your phone and the camera attachment. This creates frustrating problems like blurry images, intermittent connectivity, and total module failure. The good news? You can fix this at home with a few simple tools and the right technique.
This guide walks you through every step of identifying, cleaning, and preventing oxidation on your modular smartphone camera contacts. Whether you own a snap on telephoto lens, a magnetic macro attachment, or a pogo pin based camera module, these methods apply across the board.
Key Takeaways
- Oxidation on modular camera contacts forms when metal reacts with oxygen and moisture in the air. This creates a thin, non conductive layer that disrupts signal transfer between your phone and the camera module. Catching it early prevents permanent damage.
- Isopropyl alcohol (90% or higher) is the safest and most effective cleaning agent for oxidized electronic contacts. It dissolves contamination without leaving residue and evaporates quickly. Avoid using water based cleaners that can cause further corrosion.
- Gentle cleaning tools like cotton swabs, soft bristle brushes, and lint free microfiber cloths protect delicate contact surfaces. Never use steel wool or abrasive pads, as these scratch the thin plating layer and expose raw metal to faster oxidation.
- A pencil eraser works surprisingly well for light oxidation on flat contact pads. The mild abrasive action removes the oxide layer without damaging the underlying metal plating.
- Prevention is easier than repair. Store your modular camera attachments in dry, airtight containers with silica gel packets. Clean the contacts every two weeks if you use the attachment regularly. Apply a very thin layer of contact protectant to slow future oxidation.
- Replace the attachment if contacts show deep pitting or green corrosion. Heavy corrosion means the base metal is compromised. No amount of cleaning will restore a reliable electrical connection at that point.
What Causes Oxidation On Modular Camera Contacts
Oxidation happens when the metal surface of an electrical contact reacts with oxygen in the surrounding air. This chemical reaction produces a thin layer of metal oxide on the contact surface. That oxide layer acts as an insulator and prevents clean electrical flow between the phone and the camera module.
Moisture accelerates this process significantly. Humidity, sweat from your hands, and condensation from temperature changes all introduce water to the contact surface. Water acts as an electrolyte and speeds up the electrochemical reaction that produces oxidation. If you live in a coastal or tropical area, your contacts will oxidize much faster than those in dry climates.
Dirt and skin oils also contribute to the problem. Every time you handle your modular camera attachment, you transfer oils and microscopic debris to the contact points. These substances trap moisture against the metal surface and create tiny environments where corrosion thrives. Even fingerprints left on contacts can accelerate oxidation over time.
The type of metal plating on your contacts matters too. Gold plated contacts resist oxidation extremely well because gold does not react with oxygen. Tin plated and nickel plated contacts are more affordable but far more prone to forming oxide layers. Most budget and mid range modular camera attachments use these less resistant platings to keep costs down.
Temperature fluctuations create another risk factor. Moving your phone between hot and cold environments causes condensation to form on metal surfaces. This repeated cycle of moisture buildup and evaporation leaves behind mineral deposits that compound the oxidation problem.
How To Identify Oxidized Contacts On Your Camera Attachment
Recognizing oxidation early gives you the best chance of restoring your contacts to full working condition. The visual signs are distinct once you know what to look for. Start by removing the camera attachment from your phone and examining the contact points under bright, direct light.
Healthy contacts appear shiny and uniformly colored. Gold plated contacts should look bright yellow. Nickel or tin plated contacts should look silver and reflective. Any deviation from this clean appearance suggests contamination or oxidation.
Light oxidation appears as a dull, hazy film on the metal surface. The contacts lose their shine and look slightly cloudy or matte. At this stage, the attachment may still work but could show intermittent signal problems. You might notice occasional disconnections, slight image quality drops, or delays in the phone recognizing the module.
Moderate oxidation shows up as visible discoloration. Copper based contacts develop a greenish or bluish tint. Tin contacts turn dark gray or black. Nickel contacts develop a yellowish or brownish film. At this level, you will likely experience frequent disconnection and unreliable performance from the camera module.
Severe oxidation and corrosion produce rough, crusty deposits on the contact surface. You may see white, green, or blue crystalline buildup. The surface texture becomes uneven and pitted. This level of damage often means the protective plating has been breached and the base metal underneath has started to corrode.
Performance symptoms provide another diagnostic clue. If your camera attachment works intermittently, produces error messages, or requires you to wiggle it into position, oxidized contacts are the most likely cause. A simple visual inspection confirms the diagnosis.
Tools And Materials You Need For Cleaning
Gathering the right tools before you start makes the cleaning process smoother and safer. You do not need expensive specialized equipment. Most of what you need is already in your home or available at any hardware store.
Isopropyl alcohol is your primary cleaning agent. Choose a concentration of 90% or higher. Lower concentrations contain more water, which can leave residue and potentially cause additional corrosion. A small bottle is sufficient because you only need a few drops per cleaning session.
Cotton swabs are essential for applying cleaning solutions to small contact pads. Choose swabs with tightly wound tips that will not shed fibers. Loose cotton fibers left on contacts can trap moisture and cause problems. Foam tipped swabs are even better because they do not leave behind lint or fibers.
A soft bristle brush helps remove loose debris before wet cleaning. A clean, unused toothbrush with soft bristles works well. You can also use a small nylon detailing brush from any art supply store. Avoid brushes with metal bristles unless you are dealing with heavy corrosion on large, sturdy contacts.
A standard pencil eraser provides gentle abrasive cleaning power for flat contact surfaces. The rubber compound removes thin oxide layers through mild friction without scratching the metal plating underneath. Use a clean, white eraser rather than a colored one to avoid leaving pigment residue.
Additional helpful items include a lint free microfiber cloth, a magnifying glass or loupe for inspection, compressed air in a can, and a small plastic tray to hold parts during cleaning. A pair of rubber or nitrile gloves keeps your skin oils off freshly cleaned contacts.
How To Clean Lightly Oxidized Contacts With Isopropyl Alcohol
Light oxidation requires the gentlest approach. Isopropyl alcohol dissolves the thin oxide layer and evaporates cleanly without leaving residue. This method works best on contacts that look dull or hazy but do not have visible discoloration or buildup.
Start by powering off your smartphone completely. Remove the modular camera attachment from the phone. Place both items on a clean, dry, well lit work surface. Good lighting helps you see the contact points clearly and ensures you do not miss any spots.
Dip a cotton swab in 90% or higher isopropyl alcohol. Squeeze the swab gently against the inside of the bottle to remove excess liquid. The swab should be damp, not dripping. Excess alcohol can flow into areas where it should not go, such as behind seals or into the lens housing.
Gently rub the dampened swab across each contact point using small circular motions. Apply light, even pressure. You should see the dull film transfer onto the white cotton as you work. Rotate the swab to use a clean section as it becomes dirty. Use a fresh swab once the current one is saturated.
Repeat this process on the matching contact points on your smartphone. The phone side oxidizes too, and cleaning only one side leaves half the problem unsolved. Be extra careful around the phone contacts because they sit close to other sensitive components.
After cleaning, wait at least three to five minutes for all alcohol to evaporate completely. Inspect the contacts under bright light. They should look noticeably shinier and more uniform in color. If haze remains, repeat the alcohol cleaning one more time. Reattach the camera module only after the contacts are fully dry.
How To Remove Moderate Oxidation With A Pencil Eraser
When isopropyl alcohol alone does not restore the contacts to a clean, shiny state, a pencil eraser adds gentle mechanical cleaning power. This technique works well on flat contact pads that show visible tarnish or discoloration but no heavy buildup.
Choose a standard white rubber eraser. Pink erasers contain more abrasive compounds that could scratch delicate plating. Mechanical pencil erasers are too small and too hard for this job. A large, soft, white eraser gives you the best control and the gentlest abrasion.
Hold the camera attachment firmly in one hand. Press the eraser gently against one contact pad and rub back and forth in short, straight strokes. Use consistent, light pressure. You are not trying to grind away material. You are gently buffing off the non conductive oxide layer to reveal clean metal underneath.
You will notice a fine, dark residue forming on the contact surface as you erase. This is the removed oxide material. After ten to fifteen strokes per contact, stop and blow away the eraser debris. Use compressed air rather than your breath because moisture from your lungs can redeposit on the clean surface.
Follow up the eraser treatment with an isopropyl alcohol wipe. Dampen a cotton swab with 90% alcohol and clean each contact to remove all remaining eraser residue. This step is important because leftover rubber particles are non conductive and will interfere with the electrical connection.
Inspect the contacts carefully after cleaning. They should appear brighter and more reflective than before. If you see scratches or if the plating looks worn through to a different colored metal underneath, you have rubbed too hard or the plating was already compromised. Lighter pressure is always better.
How To Treat Heavy Oxidation And Corrosion
Severe oxidation with crusty deposits or green corrosion requires a more aggressive approach. This level of damage means the oxide layer is thick and chemically bonded to the metal surface. Simple wiping will not remove it. You need a mild chemical agent combined with careful mechanical action.
White vinegar is an effective mild acid for dissolving heavy oxidation. Dip a cotton swab in white vinegar and apply it directly to the corroded contact points. Let it sit for 30 to 60 seconds. You may see slight bubbling as the acid reacts with and dissolves the metal oxide deposits. This reaction is normal and indicates the vinegar is working.
After the brief soaking period, use a soft nylon brush to gently scrub the loosened corrosion away. Work in small strokes and avoid pressing hard enough to bend or deform the contact pins. Stubborn deposits may require a second application of vinegar followed by more gentle brushing.
Immediately after removing the corrosion, neutralize any remaining acid. Dampen a clean cotton swab with isopropyl alcohol and thoroughly wipe every contact surface. Vinegar is a mild acid, but leaving it on metal surfaces will cause new corrosion over time. The alcohol flush removes the vinegar residue and dries the surface quickly.
A baking soda paste offers an alternative for contacts corroded by acidic substances. Mix a tiny amount of baking soda with a few drops of water to form a thick paste. Apply it to the corroded areas with a cotton swab and let it sit for one to two minutes. Scrub gently with a soft brush, then clean away all paste residue with isopropyl alcohol.
Inspect the contacts thoroughly after heavy cleaning. Look for deep pits, scratches through the plating, or areas where the base metal is exposed. If you see significant plating damage, the contacts may not maintain a reliable connection even after cleaning. At that point, replacing the attachment is the safest option.
How To Clean Pogo Pin Contacts On Modular Camera Systems
Many modular smartphone camera systems use spring loaded pogo pins to make electrical connections. These tiny pins press against flat contact pads when the module is attached. Their small size and moving parts make them especially vulnerable to oxidation and debris buildup.
Pogo pins require extra care during cleaning because of their delicate spring mechanism. Pressing too hard can damage the internal spring or push the pin into its housing permanently. Always apply the lightest possible pressure and let the cleaning agent do most of the work.
Dip a foam tipped swab in 90% isopropyl alcohol. Gently dab and roll the swab tip over each pogo pin. The rolling motion cleans the pin surface without pushing the pin down too far. Avoid dragging the swab sideways across pogo pins because lateral force can bend them out of alignment.
For stubborn oxidation on pogo pins, hold the camera module upside down so the pins face downward. Apply a small drop of isopropyl alcohol to each pin and let gravity pull the liquid down the pin shaft. This flushes debris from around the base of the pin where it meets the housing. The alcohol also penetrates around the spring mechanism and dissolves any contamination affecting pin movement.
Check that each pogo pin moves freely after cleaning. Gently press each pin with a plastic toothpick or the blunt end of a wooden skewer. The pin should depress smoothly and spring back immediately when released. If a pin sticks, feels gritty, or does not return to full extension, additional cleaning or professional repair may be needed.
Compressed air provides a useful finishing step for pogo pin contacts. A short blast of canned air removes any remaining loose debris from around the pin housings. Hold the can upright and use short bursts to avoid spraying liquid propellant onto the contacts.
How To Clean Magnetic Connector Contacts
Some modular camera attachments use magnetic mounting systems with exposed contact pads. These flat, circular contact pads sit flush against the phone’s surface and rely on magnetic force to maintain both physical attachment and electrical connection. Their exposed position makes them particularly prone to contamination.
Magnetic contacts attract metallic dust and particles from pockets, bags, and everyday environments. This metallic debris sticks to the magnets surrounding the contacts and can bridge across contact pads, causing short circuits or signal interference. Regular cleaning is essential for magnetic systems.
Start by using a piece of adhesive tape or a sticky lint roller to lift metallic particles off the magnetic surface. Press the tape firmly against the contact area and peel it away. Repeat this several times with fresh tape sections. This removes the magnetic debris that a brush or cloth would simply push around.
Next, clean the contact pads themselves with isopropyl alcohol on a lint free cloth. Wipe each pad individually using a circular motion. For recessed contacts, use a cotton swab to reach into the slight depressions where oxidation often hides. Pay attention to the edges of each contact pad where the metal meets the surrounding material, because oxidation frequently starts at these boundaries.
After cleaning, inspect the flat contact surfaces for scratches or wear marks. Magnetic mounting systems see repeated attachment and detachment cycles that gradually wear down the contact plating. If you see the underlying copper or base metal showing through, that area will oxidize very quickly and may need more frequent maintenance.
Avoid using any ferrous metal tools near magnetic contacts. Steel brushes, metal picks, or iron based scrapers will be attracted to the magnets and can scratch or damage the delicate contact surfaces. Stick with plastic, wood, and nylon tools exclusively.
What Cleaning Products To Avoid
Knowing what not to use is just as important as knowing the right cleaning methods. Several common household products can damage electronic contacts, strip protective plating, or leave conductive residue that causes short circuits.
Never use tap water to clean electronic contacts. Tap water contains dissolved minerals, chlorine, and other chemicals that leave conductive residue on metal surfaces. This residue can cause short circuits and accelerate future corrosion. If you must use water (such as for rinsing baking soda paste), use distilled water only and dry the contacts immediately and completely.
Steel wool and metal scouring pads are too aggressive for electronic contacts. They scratch through thin plating layers in seconds and leave behind tiny metal fragments that cause short circuits. Even fine grade steel wool removes too much material from delicate smartphone contacts.
Avoid bleach, ammonia based cleaners, and strong household chemicals. These substances attack both the metal contacts and the surrounding plastic housings. They can also leave invisible chemical films that become conductive when exposed to humidity, creating unpredictable electrical problems.
WD 40 is not a contact cleaner. Despite popular belief, WD 40 leaves an oily film that attracts dust and eventually gums up contact surfaces. It can also damage certain plastics and rubber seals found in modular camera attachments. Use products specifically formulated as electronic contact cleaners instead.
Acetone and nail polish remover dissolve many types of plastic. A single drop on the wrong surface can permanently damage the housing of your camera attachment or your phone. While acetone is an effective solvent for cleaning bare metal contacts in industrial settings, it is too risky for consumer electronics with plastic components.
Toothpaste is another commonly suggested but poor choice. It contains abrasive particles that scratch contacts and flavoring compounds that leave sticky residue. The cleaning effect is real but the collateral damage outweighs the benefit.
How To Dry Contacts Properly After Cleaning
Proper drying is a critical step that many people rush through or skip entirely. Moisture left on contacts after cleaning defeats the purpose of the entire process. Residual liquid accelerates new oxidation and can cause immediate electrical problems when you reattach the camera module.
Allow isopropyl alcohol at least three to five minutes to evaporate naturally at room temperature. Higher concentration alcohol (90% and above) evaporates faster than lower concentrations. Set the cleaned components on a clean, lint free cloth in a well ventilated area and resist the urge to reassemble early.
Compressed air speeds up the drying process and reaches moisture trapped in tight spaces. Hold the can at least six inches from the contacts and use short, controlled bursts. Long, continuous sprays from canned air can release liquid propellant that leaves its own residue on contact surfaces. Keep the can upright during use.
If you used any water based cleaning agents like diluted vinegar or baking soda paste, extend your drying time significantly. Water evaporates much slower than isopropyl alcohol. Use compressed air to blow out visible moisture, then allow at least 15 to 20 minutes of air drying. In humid environments, consider using a fan to increase air circulation around the components.
A gentle heat source can assist with drying in cold or humid conditions. A hair dryer on its lowest heat setting held at arm’s length works acceptably. Do not use high heat. Excessive temperature can warp plastic housings, damage adhesive bonds in lens assemblies, and even melt thin solder connections inside the camera module.
After the drying period, perform a final visual inspection under bright light. Look for any remaining moisture droplets, especially in recessed areas and around pin housings. The contacts should look completely dry and uniformly colored before you reconnect anything.
How To Apply Contact Protectant After Cleaning
Once your contacts are clean and fully dry, applying a protective treatment slows future oxidation and extends the time between cleanings. This preventive step takes only a minute but makes a meaningful difference in long term reliability.
Electronic contact protectant sprays create a microscopic barrier between the metal surface and the surrounding air. This barrier prevents oxygen and moisture from reaching the metal and starting the oxidation process. These products are specifically formulated for electronic connections and will not interfere with electrical conductivity.
Apply contact protectant sparingly. A single light spray or a thin wipe with a treated cloth is sufficient. More is not better with contact protectant. Excess product can attract dust, create a sticky film, or flow into areas where it causes problems like lens fogging or adhesive weakening.
For flat contact pads, apply a tiny amount of protectant to a lint free cloth and wipe across each pad once. For pogo pins, a single short spray from six inches away provides adequate coverage. Let the protectant dry or cure according to the product instructions before reassembling your camera module.
Dielectric grease offers another form of protection, especially for contacts exposed to wet or humid conditions. Apply an extremely thin, nearly invisible layer to contact surfaces using a clean fingertip or cotton swab. Dielectric grease repels water and prevents corrosion but does not conduct electricity. The mechanical pressure of the contacts mating together displaces the grease at the actual contact points, allowing electrical flow while the surrounding grease keeps moisture out.
Reapply protectant or dielectric grease every time you deep clean the contacts or approximately once a month during regular use. If you store the camera attachment for extended periods, a fresh application before storage helps preserve the contacts in clean condition.
How To Store Modular Camera Attachments To Prevent Oxidation
Proper storage eliminates the primary causes of contact oxidation: humidity, air exposure, and temperature fluctuation. A little effort in how you store your camera attachments pays off with contacts that stay cleaner much longer.
Keep your camera attachments in airtight containers when not in use. A small zip seal plastic bag works for casual storage. For better protection, use a rigid plastic container with a tight fitting lid. The goal is to limit the amount of fresh, humid air that reaches the contact surfaces.
Add silica gel packets to your storage container. These inexpensive desiccant packets absorb moisture from the enclosed air and maintain a low humidity environment around your equipment. Replace or recharge the silica gel packets every few months to maintain their effectiveness. You can recharge silica gel by heating it in an oven at a low temperature according to the packet instructions.
Avoid storing camera attachments in bathrooms, kitchens, or near windows. These locations have high humidity levels and frequent temperature swings that promote condensation. A bedroom drawer or closet shelf provides a much more stable environment with lower moisture levels.
Temperature stability matters as much as humidity control. Avoid leaving your camera attachment in a hot car, in direct sunlight, or near heating vents. Rapid temperature changes cause condensation to form on metal surfaces even inside sealed containers. Store your gear in spaces where the temperature remains relatively consistent.
If you carry your modular camera attachment in a bag or pocket, consider wrapping it in a small microfiber cloth before placing it inside. The cloth absorbs surface moisture, reduces physical abrasion, and provides a buffer against temperature changes. Clean the contact points when you return home from any outdoor session, especially in humid, salty, or dusty environments.
How Often Should You Clean Modular Camera Contacts
A regular cleaning schedule prevents oxidation from building up to a problematic level. The right frequency depends on how often you use the attachment, your local climate, and how you store your gear between uses.
Heavy users who attach and remove the camera module daily should clean contacts every one to two weeks. Frequent handling introduces skin oils and debris to the contact surfaces with every connection cycle. A quick wipe with isopropyl alcohol takes less than a minute and keeps oxidation from gaining a foothold.
Moderate users who use the camera attachment a few times per month need cleaning approximately once a month. At this usage level, oxidation accumulates slowly but steadily. A monthly cleaning session combined with proper storage keeps contacts in excellent condition year round.
If you live in a humid or coastal environment, increase your cleaning frequency regardless of usage level. High humidity areas push oxidation rates significantly higher than dry climates. Contacts stored in humid conditions can show visible tarnish within just a few weeks, even without being touched or used.
Seasonal users who pull out their camera attachment only for vacations or special events should clean the contacts both before storage and before use. Clean and apply protectant before putting the attachment away. Clean again when you take it out, because even protected contacts may develop light oxidation during long storage periods.
Watch for performance symptoms between scheduled cleanings. If the camera module starts acting intermittently, shows connection errors, or produces degraded image quality, clean the contacts immediately rather than waiting for your next scheduled session. These symptoms indicate that oxidation has already reached a level that affects functionality.
When To Replace Instead Of Clean
Sometimes cleaning is not enough to save oxidized contacts. Knowing when to stop cleaning and start shopping for a replacement saves you time, frustration, and potential damage to your phone.
Deep pitting on contact surfaces indicates irreversible damage. Pitting means the corrosion has eaten into the base metal beneath the plating. No amount of surface cleaning restores a smooth, flat contact surface once pits have formed. These uneven surfaces create unreliable connections that cause persistent signal problems.
Green or white crystalline growth that returns quickly after cleaning signals an ongoing corrosion process within the metal itself. If you clean the contacts and see new corrosion forming within days, the protective plating has been compromised beyond repair. The base metal is actively corroding from within, and cleaning only addresses the surface symptoms temporarily.
Bent, broken, or stuck pogo pins need professional repair or module replacement. Cleaning cannot fix mechanical damage. A pin that does not spring back to full extension will not make proper contact with the matching pad, regardless of how clean the surfaces are.
Inspect the plastic housing around the contacts for cracks, warping, or separation. Structural damage to the housing allows moisture, dust, and debris to reach the contacts continuously. Even perfectly clean contacts will oxidize rapidly if the housing no longer seals properly against environmental exposure.
If cleaning and reassembling the camera module more than three times fails to resolve connection issues, the problem likely extends beyond surface oxidation. Internal wiring, solder joints, or circuit board traces may be corroded. These internal failures require professional repair tools and skills that go beyond what home cleaning can address.
Frequently Asked Questions
Can I use rubbing alcohol instead of isopropyl alcohol to clean camera contacts?
Rubbing alcohol often contains additives like water, fragrances, or wintergreen oil that leave residue on contact surfaces. Use pure isopropyl alcohol at 90% concentration or higher for electronic contact cleaning. The higher the concentration, the less water content remains to potentially cause new corrosion. You can find 99% isopropyl alcohol at most pharmacies and electronics stores.
Will cleaning oxidized contacts void my warranty on the camera attachment?
Basic external cleaning of contact surfaces with isopropyl alcohol and a cotton swab generally does not void warranties because you are not opening or modifying the device. However, using abrasive methods, strong chemicals, or opening sealed housings could void your warranty. Check the manufacturer’s care instructions before cleaning. If the device is still under warranty and the contacts have heavy corrosion, consider contacting the manufacturer for a replacement instead.
How do I know if the problem is oxidized contacts or a broken camera module?
Clean the contacts thoroughly first and test the attachment. If the problems persist with clean contacts, try the camera module on a different compatible phone if possible. If it fails on multiple phones, the module itself likely has an internal fault. If it works on a different phone, your phone’s contacts may need cleaning too. Oxidized contacts cause intermittent issues, while a broken module typically causes complete and consistent failure.
Can I use a fiberglass scratch brush to clean electronic contacts?
Fiberglass scratch brushes are effective at removing oxidation but carry risks for delicate smartphone contacts. The tiny glass fibers are very abrasive and can remove thin plating quickly. They also leave behind microscopic glass particles that are difficult to remove completely. Use a fiberglass brush only as a last resort on heavily corroded contacts that you are prepared to replace if the cleaning fails. A pencil eraser or nylon brush is safer for routine maintenance.
Is it safe to use contact cleaner spray directly on my smartphone?
Use contact cleaner spray cautiously around smartphones. Spray the cleaner onto a cotton swab or cloth first, then apply it to the contacts rather than spraying directly onto the phone. Direct spraying can force liquid into speaker grilles, microphone ports, or behind screen seals. Always choose a contact cleaner labeled safe for plastics and electronics, and avoid sprays containing oils or lubricants that leave residue on contact surfaces.
How long do freshly cleaned contacts stay oxidation free?
Clean contacts in a dry environment with protectant applied can remain oxidation free for one to three months. Without protectant, visible oxidation may begin within two to four weeks in moderate humidity. In highly humid or coastal environments, unprotected contacts can show signs of oxidation in as little as one week. Proper storage in airtight containers with desiccant extends the clean period significantly.

I’m a tech enthusiast who loves breaking down gadgets, apps, and tools into simple, honest reviews. At GenResizeHub, I help you make smarter buying decisions through in-depth comparisons and easy-to-follow guides. Got a question? Drop me a mail!