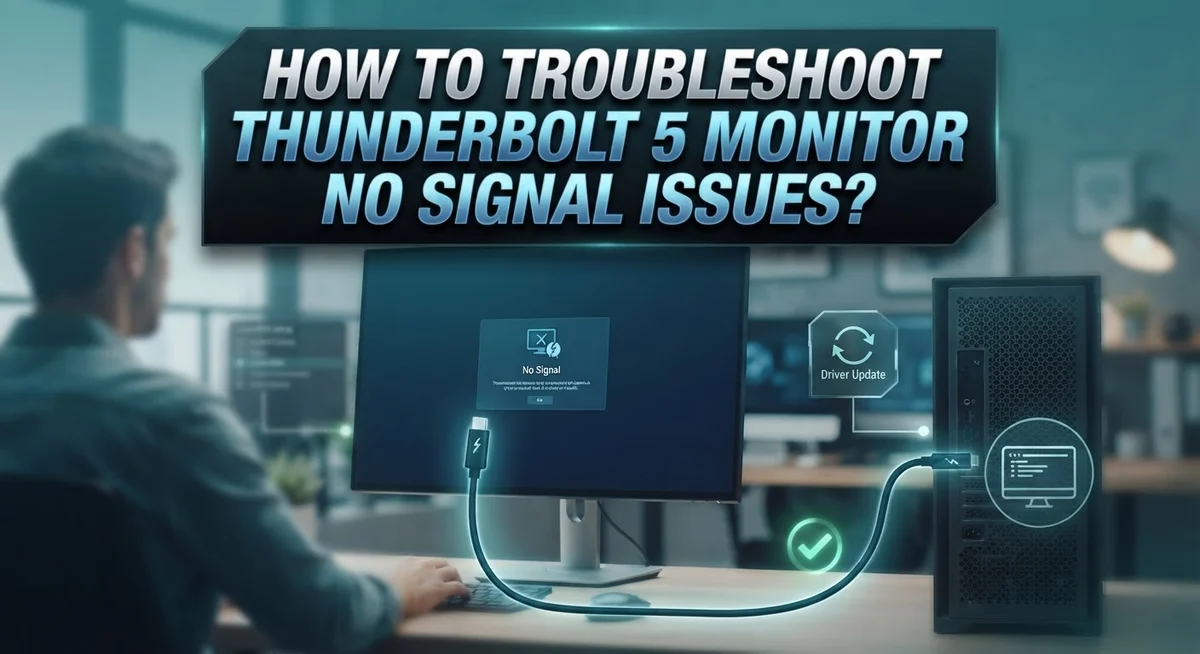
How To Troubleshoot Thunderbolt 5 Monitor No Signal Issues?
Your new Thunderbolt 5 monitor stays black. You plug in the cable. You wait. Still, nothing shows up on screen.
This is a common problem. Many users face a no signal message even when everything looks connected. It can feel frustrating, especially with new tech.
The good news is that most Thunderbolt 5 issues are easy to fix. You do not need to be a tech expert. You just need the right steps.
This guide walks you through simple checks. We will look at power problems first. Then we will check your cables and ports.
By the end of this article, you will know exactly how to test your setup. You will find the exact cause of the no signal error.
Let’s get your screen working again.
In a Nutshell
- Check your power first. Make sure the monitor and your device both turn on. A weak power source often causes display failures.
- Inspect all cables. Use a certified Thunderbolt cable and confirm it is fully plugged into both ports. Loose connections are a top cause of signal loss.
- Test different ports. Try another Thunderbolt port on your computer and monitor. This helps you rule out a broken or damaged port.
- Select the correct input. Your monitor might be set to the wrong source. Cycle through the input menu until you find the right one.
- Update your software. Old drivers or outdated BIOS firmware often block a proper connection. Keep these updated for smooth performance.
- Remove extra hardware. Docks, hubs, or adapters can sometimes interrupt the signal. Connect your monitor directly to test the link.
Understanding Thunderbolt 5 No Signal Errors
A Thunderbolt 5 monitor showing no signal means your display receives no data from your computer. This issue falls into three main categories: power problems, connection failures, and compatibility conflicts.
Power issues occur when the monitor doesn’t turn on or the computer fails to detect it. Your monitor needs electricity to function, and your computer needs power delivered to its graphics port. Without both, you see a blank screen.
Connection failures happen when cables don’t sit properly in ports or when the wrong cable type connects to your devices. Thunderbolt 5 uses specific connectors. A loose cable or damaged port prevents data from traveling between your monitor and computer.
Compatibility conflicts arise when your monitor and computer don’t communicate properly. This includes wrong input selection on the monitor, outdated drivers on your computer, or mismatched refresh rates. Your monitor might support multiple input sources. If it’s set to the wrong one, it won’t display your computer’s signal even though the connection works fine.
The handshake process is also important. When you plug in a Thunderbolt cable, your monitor and computer exchange information about resolution, refresh rate, and color depth. If this handshake fails, no image appears.
Physical damage to cables or ports creates signal loss too. A bent connector or a cracked port prevents proper contact between devices.
Understanding these error categories helps you troubleshoot faster. You’ll know whether to check power first, test cables next, or adjust settings afterward. Most no signal problems stem from simple fixes rather than hardware failure. By isolating which category your issue belongs to, you can resolve it quickly and get back to work.
Checking Power Sources and Connections
Start by confirming your monitor receives power. Look for a power indicator light on the front or back of the device. If you see no light, plug the monitor into a different electrical outlet. Sometimes a faulty power strip or outlet causes the issue.
Next, verify the AC adapter works correctly. Unplug it from the monitor and inspect the cable for cuts or damage. If you have access to another compatible power adapter, test it with your monitor. A broken adapter prevents the display from turning on, even if everything else functions properly.
Check that your computer also has sufficient power. Ensure your laptop or desktop is plugged in and turned on. If you are using a laptop on battery, connect it to power before testing the connection. Low battery states sometimes prevent proper Thunderbolt communication.
Inspect all cable connections thoroughly. Thunderbolt cables must sit completely flush in both ports. Push the cable firmly into your monitor’s Thunderbolt port until you hear a click. Then connect the other end to your computer’s Thunderbolt port with the same pressure. Loose connections are a leading cause of no signal problems.
Look at both the monitor port and computer port for visible damage. Check for bent pins, debris, or corrosion inside the ports. Gently clean any dust with a dry cloth if needed.
Finally, verify your monitor is set to the correct input source. Many Thunderbolt monitors have a menu button or settings option. Press it and select Thunderbolt as the active input. Some monitors default to HDMI or DisplayPort instead. Switching to the right input often solves the black screen instantly.
Testing Cables, Ports, and Alternate Connections
When your Thunderbolt 5 monitor shows no signal, testing your cables and ports systematically helps you find the problem fast. Start by examining your Thunderbolt cable closely for any visible damage, fraying, or bent connectors. A damaged cable stops data from reaching your monitor even if everything else works fine.
Next, unplug the cable from both the monitor and your computer. Wait a few seconds, then reconnect it firmly. Make sure the connector clicks into place on both ends. A loose connection is one of the most common causes of signal loss.
Try using a different Thunderbolt cable if you have one available. This step tells you whether your original cable is faulty or working properly. Certified cables work best, so check that your replacement meets official standards.
Now test different ports on both your computer and monitor. Your device likely has multiple Thunderbolt ports. Plug your cable into another port and see if the signal returns. Do the same on your monitor if it has multiple inputs. Sometimes a single port fails while others remain functional.
Remove any docks, hubs, or adapters between your computer and monitor temporarily. These devices can interfere with the signal or cause compatibility problems. Connect your monitor directly to your computer using only the Thunderbolt cable.
Inspect both ports carefully for dust, debris, or physical damage inside. Use a flashlight to look deep into the connectors. If you see bent pins or corrosion, that port may be broken and need professional repair.
After testing these components, restart both your computer and monitor. This refresh often resolves temporary connection glitches and allows your devices to communicate properly again.
Updating Drivers, BIOS, and Firmware
Outdated drivers and firmware are common reasons your Thunderbolt 5 monitor fails to display a signal. Your graphics card, monitor, and computer all need current software to communicate properly. Start by checking your GPU manufacturer’s website for the latest display drivers. Download and install them, then restart your computer completely.
Next, update your monitor’s firmware if available. Visit the monitor manufacturer’s support page and look for firmware updates specific to your model. Follow their instructions carefully. Some monitors require you to update firmware through a USB connection or special software utility.
BIOS updates matter too. Your computer’s BIOS controls how hardware devices interact. Visit your motherboard or computer manufacturer’s website and search for BIOS updates. Download the correct version for your exact model. Follow their step by step guide precisely, as incorrect BIOS updates can cause serious problems.
After updating drivers, restart your system and reconnect your monitor. Wait a few minutes for your computer to recognize the display. Sometimes the connection takes longer after updates.
If you still see no signal, try resetting your embedded controller (EC). Power off your computer completely. Unplug the AC adapter for 30 seconds, then plug it back in. This resets your system’s power management settings.
Test your monitor with another computer if possible. This tells you whether the problem is your monitor or your computer setup. If the monitor works elsewhere, your computer’s drivers or BIOS likely need attention.
Keep all your drivers and firmware current going forward. Set reminders to check for updates monthly. Regular updates prevent many signal problems before they start.
Resetting BIOS and Embedded Controller Settings
Resetting your BIOS and embedded controller can fix communication problems between your computer and Thunderbolt 5 monitor. These resets clear corrupted settings that block signal detection.
To reset your BIOS, restart your computer and enter the BIOS setup menu. Most computers use Delete, F2, or F12 during startup. Look for a “Reset to Default” or “Load Optimized Defaults” option. Select it and save your changes. This removes any custom settings that might conflict with your monitor connection.
Your embedded controller (EC) manages power and hardware communication. Resetting it often solves handshake failures. Power off your computer completely. Unplug the power cable and wait 30 seconds. This drains residual power and resets the EC. Plug the cable back in and power on normally.
Some laptops have a dedicated EC reset key combination. Check your device manual for the specific steps. Common combinations include holding Power plus another key for 10 to 15 seconds while powered off.
After resetting either component, reconnect your Thunderbolt 5 cable and test your monitor. Wait a full minute for the system to stabilize before checking for signal.
If you still see no signal, check that your monitor input is set correctly. Navigate to your monitor’s on screen menu using its physical buttons. Select the input that matches your cable type. Thunderbolt 5 monitors typically use Thunderbolt or USB C input modes.
Document any error codes or warning lights that appear during this process. These details help identify remaining issues. If problems persist after these resets, contact your monitor manufacturer’s support team with this information.
Verifying Monitor Input and Display Settings
Your Thunderbolt 5 monitor’s input settings control which video source it displays. When you see no signal, the monitor might be looking at the wrong input port. This is one of the easiest problems to fix.
Start by checking your monitor’s physical buttons or on-screen menu. Most monitors have a button labeled “Input,” “Source,” or “Menu” on the front or back panel. Press this button to open the input selection screen. Your monitor will show all available input options like Thunderbolt, DisplayPort, HDMI, or USB-C.
Look at which input is currently selected. Make sure it matches the port where you plugged in your cable. If your Thunderbolt cable connects to the Thunderbolt port on the monitor, select “Thunderbolt” from the menu. If you’re using an adapter that converts to DisplayPort, select “DisplayPort” instead.
Some monitors automatically detect the active input. Others require you to manually select it. If your monitor supports auto-detection, try enabling this feature in the display settings menu. This saves you from manually switching inputs each time.
After selecting the correct input, wait a few seconds for the signal to appear. Your monitor needs time to establish the connection. If you still see no signal, verify the cable is fully inserted into both the monitor and your computer port.
Check your computer’s display settings too. On Windows, right-click your desktop and select “Display Settings.” On Mac, go to “System Preferences” and choose “Displays.” Confirm your Thunderbolt 5 monitor appears in the list of connected displays. If it doesn’t appear, your computer isn’t recognizing the monitor yet, which points to a cable or port issue rather than an input selection problem.
Common Mistakes to Avoid
Many people make simple mistakes when troubleshooting Thunderbolt 5 monitor issues. Understanding these errors helps you fix problems faster.
Wrong cable selection causes more problems than you might think. Using uncertified cables or damaged ones prevents proper signal transmission. Always inspect your cable for visible cracks, bent connectors, or fraying. If you’re unsure about your cable’s condition, test with a different one. This single step solves many no signal problems.
Overlooking port compatibility is another frequent mistake. Your computer and monitor may have multiple Thunderbolt ports, but not all work the same way. Some ports support video output while others don’t. Test each port on both devices systematically. Document which combinations work and which don’t.
Ignoring power connections leads to confusion. Your monitor needs adequate power to function properly. Check that the power cable is fully inserted into both the monitor and wall outlet. Look for indicator lights on your monitor that show it’s receiving power. A powered off monitor will never display a signal.
Skipping basic checks wastes your time later. Before trying complex solutions, verify that cables are completely seated. Push connectors firmly until you hear or feel a click. Loose connections are the most common culprit.
Mixing up input selection happens frequently. Your monitor might be powered on but displaying the wrong input source. Check your monitor’s menu to confirm it’s listening to the Thunderbolt input, not HDMI or DisplayPort.
Rushing through troubleshooting prevents you from finding real problems. Take notes about what you’ve tested. Write down any error messages or warning lights. This information helps you identify patterns and solve issues systematically.
Advanced Troubleshooting for Persistent Issues
When basic troubleshooting doesn’t work, you need to dig deeper into your system’s hardware and software layers. Start by isolating whether the problem is power, video, or compatibility related. Each issue requires different diagnostic steps.
Check your Thunderbolt 5 cable first. Try a different certified cable to rule out cable failure. Test every Thunderbolt port on both your monitor and computer. Sometimes one port works while others don’t. This tells you if the problem is port specific or system wide.
Next, inspect all physical connections carefully. Look inside the ports for bent pins or debris. Ensure your GPU has proper power connections. A loose 6 pin or 8 pin connector can cause no signal issues even if everything else looks correct.
Remove any docks, hubs, or adapters temporarily. These devices can interfere with the Thunderbolt handshake process. Connect your monitor directly to your computer’s Thunderbolt port instead.
Update your monitor’s firmware if available. Manufacturers release updates that fix compatibility problems with specific graphics cards. Check the monitor’s settings menu for a firmware update option.
If your monitor has an embedded controller, it manages power and video communication. A firmware update here can resolve persistent signal issues.
Test your monitor with another computer if possible. This confirms whether the problem is with your monitor or your computer. If it works elsewhere, your computer’s Thunderbolt controller or drivers need attention.
Document any error codes or warning lights that appear. These clues help identify what’s actually failing. Take photos of warning indicators for reference.
Final Thoughts
Thunderbolt 5 no signal problems feel frustrating. But most issues come from simple causes. A loose cable, wrong input, or outdated driver often blocks your signal.
Start with the basics every time. Check your power connections first. Then verify your cable and port choices.
Move through each step in order. Skipping steps often leads you back to the same problem. Patience saves you time in the long run.
Your Thunderbolt 5 cable matters more than you think. Certified cables handle higher bandwidth and power needs. A cheap or damaged cable causes handshake failures between your monitor and computer.
Firmware and driver updates fix many hidden problems. Manufacturers release these updates to solve compatibility issues. Keep your system current to avoid repeat problems.
Sometimes the fix requires deeper digging. Resetting your BIOS or embedded controller helps when basic steps fail. This clears out corrupted settings that block your signal.
Testing with another computer or monitor isolates the real problem. This step tells you if your monitor, cable, or computer causes the issue. Isolation testing saves you guesswork.
Documentation helps you track your progress. Write down error codes and warning lights you see. This information helps if you need professional support later.
Most Thunderbolt 5 signal issues resolve with methodical checking. You don’t need advanced technical skills to fix common problems. Just follow each step carefully and test after every change.
Trust the process and stay calm during troubleshooting. Rushing leads to missed steps and repeated frustration. Take your time and check each element in your setup, from power to cables to settings.
Your persistence pays off. Most no signal issues have simple explanations and simple fixes.
Frequently Asked Questions
Why does my Thunderbolt 5 monitor stay black even though it’s powered on?
A black screen usually means the video signal isn’t reaching your monitor. Start by checking that your monitor’s input is set to the correct source. Many monitors default to HDMI or DisplayPort instead of Thunderbolt. Press your monitor’s menu button and verify the active input selection. Next, ensure your Thunderbolt cable is fully seated on both the monitor and your computer. A loose connection stops the signal immediately.
Can a faulty Thunderbolt cable cause a no signal problem?
Yes, cable issues are a top cause of signal loss. Try a different Thunderbolt cable to test this quickly. If the second cable works, your original cable is damaged. Also test different ports on both your monitor and computer. Sometimes one port fails while others work fine. This helps you pinpoint whether the problem is the cable, the port, or something else entirely.
Should I update my monitor’s firmware to fix signal problems?
Firmware updates often solve compatibility issues between your monitor and computer. Check your monitor’s manual or manufacturer website for available updates. These updates improve how your monitor communicates with your graphics card and operating system. Installing the latest firmware takes just a few minutes and frequently resolves signal handshake problems.
What if nothing works after trying these steps?
Reset your computer’s BIOS settings to factory defaults. This clears any conflicting display configurations in your system. Also update your graphics card drivers to the newest version. If problems persist, test your monitor with a different computer. This tells you whether the issue is your monitor or your computer’s hardware and software.

I’m a tech enthusiast who loves breaking down gadgets, apps, and tools into simple, honest reviews. At GenResizeHub, I help you make smarter buying decisions through in-depth comparisons and easy-to-follow guides. Got a question? Drop me a mail!